Boilsoft Audio Converter for Mac Tutorial
Step by Step Tutorial
Step by Step Tutorial
- Add video or audio formats
- Edit the files
- Customize the audio and select the destination folder.
- Customize the metadata information
-
Get your cool melody
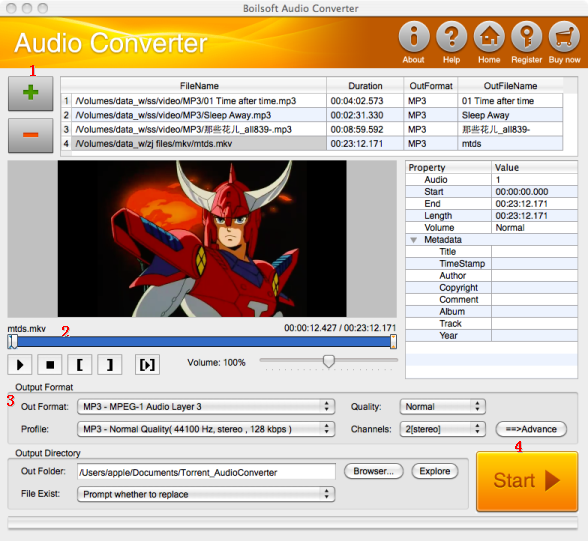
Step 1 Add video or audio formats
Press
![]() to add the files you want to convert, clicking
to add the files you want to convert, clicking
![]() to remove them.
to remove them.
Supported formats include 3GP, AAC, AC3, AIF, ALAC, AOB, APE, ARM, AU, CD Audio, DIRAC, EVO,WV,IVF, M4A, MOV, MP3, MPA, NUV, MPC , TTA, TS, WAV, PVA, RA, Real Media, SD2, SHN, MKV, DivX, DVR, FLAC, FLIC, FLV, GIF, MKA, MP4, MPEG, OFR, OGG, OGM, SND, TIVO, Video CD, VOB, VRO , Windows Media, WMA, WMV.
Output formats can be AAC, AC3, AIFF, AU, FLAC, M4A, MKA, MP2, MP3, OGG, WAV, and etc. .
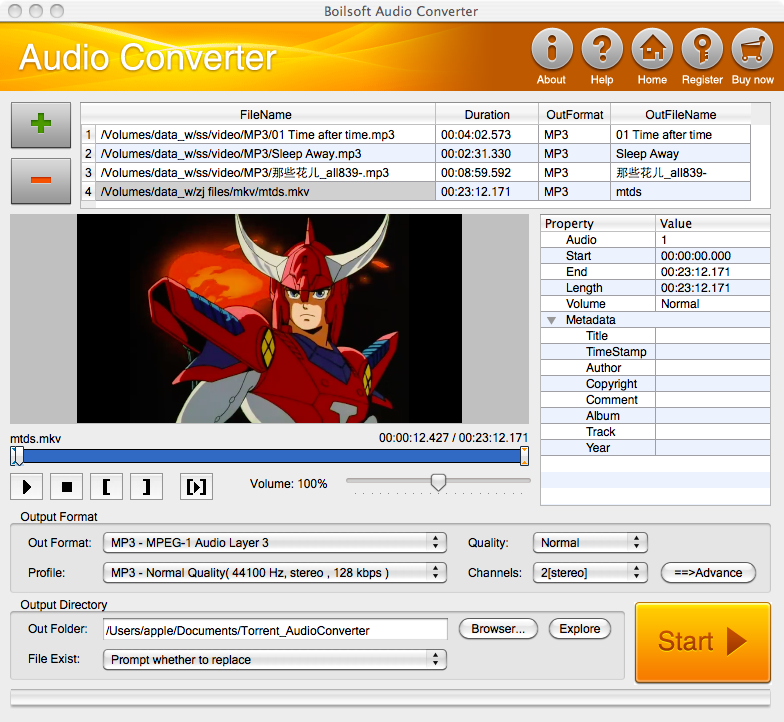
Step 2 Edit the files (Optional )
Press
![]() to play the video or audio files and the timer will start to work. Press
to play the video or audio files and the timer will start to work. Press
![]() to stop. This feature is designed for you to measure your favorite segment.
to stop. This feature is designed for you to measure your favorite segment.
The panel allows you to set the expected volume of the output file.
When you want to specify the segment, you can press
![]() to set starting time and
to set starting time and
![]() ending time.
ending time.
In detail, there are four steps to specify the segment:
- Play the source file
-
Pause where you want to set as the start point, and press Set Start Point Button
 .
.

-
Continue to play, pause where you want to set as the end point, and press Set End Point Button
 .
.

-
Press
 to listen to the selected segment.
Step 3 Customize the audio and select the destination folder.

- As can be seen from the diagram, the panel allows you to customize the format, quality, parameters and channels of the output audio.
-
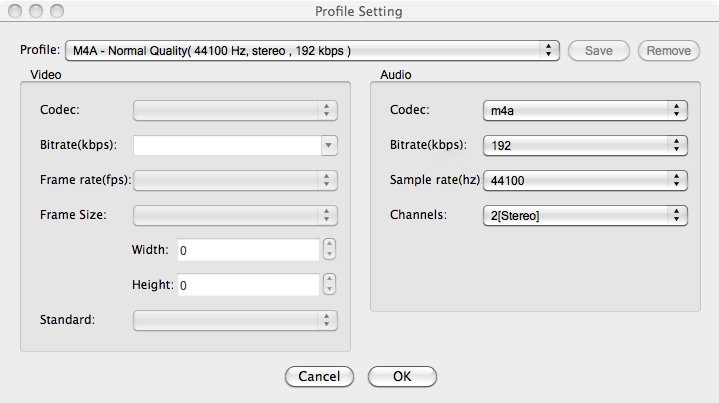
Press
 to further edit the parameters
(Optional)
:
to further edit the parameters
(Optional)
:
Next, you can specify the destination folder:

- Press Browser to browse folders and then define the target folder.
- Alternatively, you can directly type in where it should be.
Step 4 Customize the metadata information (Optional)
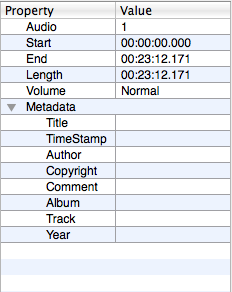
We can see from the picture that the metadata information of the output audio, such as title, timestamp, copyright, author, comment, album, track, year, can be customized merely by typing in what you want to display!
When all settings are completed, just press Start Button. If the audio converter successfully convert the files, a window like this will be shown:
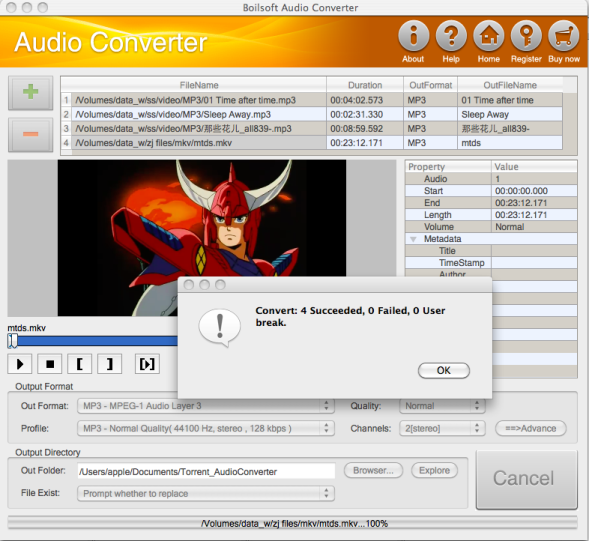
Press OK , and then get the converted files from your output directory.
Tutorials
Topics

Copyright © 2023 Boilsoft Systems International Inc. All rights reserved.