Boilsoft Video Converter for Mac Tutorial
Video Converter for Mac, all-in-one video converter, convert all popular video formats.
Step by Step Tutorial
How to convert video files by using our video converter? Here is a Step by Step Tutorial, which can be divided into four parts:
Step 1 Get Started and Add File
1-1. After installation, just run the software, and the main interface will be displayed as below
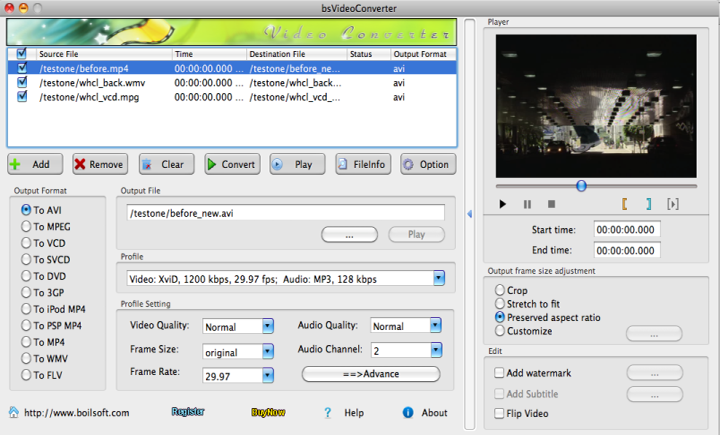
1-2
. Now Press
![]() button on the tool bar to add source file, or directly drag the file to the video converter.
button on the tool bar to add source file, or directly drag the file to the video converter.
Optional : Press Play button or use the preview player to preview file.
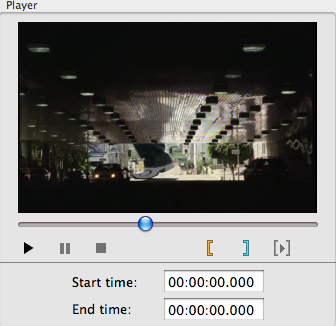
Tip
: If you merely want to convert a certain segment of the video file, you can use
![]() to select the Start Time and and
to select the Start Time and and
![]() to select End Time.
to select End Time.
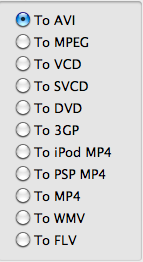
Step 2: Choose the output format , which can be RM, RMVB, AVI, MPEG, VCD, SVCD, DVD, 3GP, iPod Mp4, PSP MP4 and MP4, FLV)
Step 3: Set Output file settings:
3-1. Set destination file folder here:

Press button
![]() to set the converted video's output folder.
to set the converted video's output folder.
Press the play button to play the converted video file
3-2. Set video/ audio settings in detail:
You can use the default profile settings, or personalize expected values.
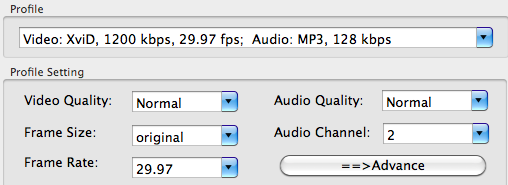
Press the Advance button to customize more settings:
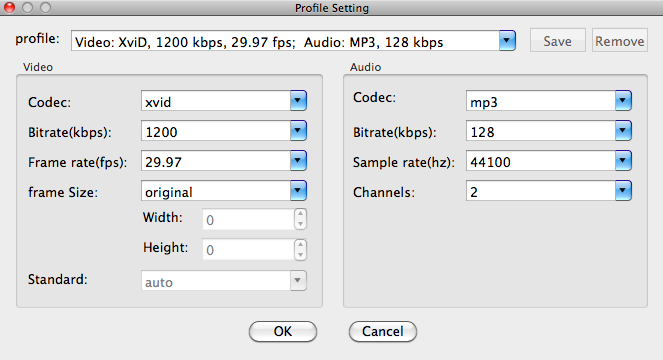
When all settings are completed, just press OK.
Step 4: Just feel free to press
![]() Button on the toolbar to start conversion, and then get your converted video from the target folder.
Button on the toolbar to start conversion, and then get your converted video from the target folder.
Tips: If you want to enrich your video experience, the following functions are recommended before conversion:
Edit: Edit your video file.
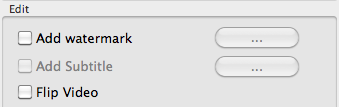
By using this tiny panel, you can add watermark to your video file, even flip the output video image vertically( make the video image inversed ).
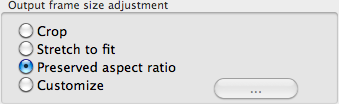
Adjust output frame size:
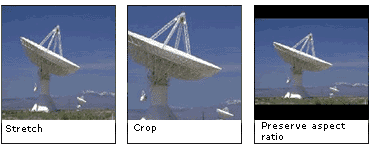
The relevant effects will be like these:
When you select Customize , the Frame Size Adjustment Controller will be displayed
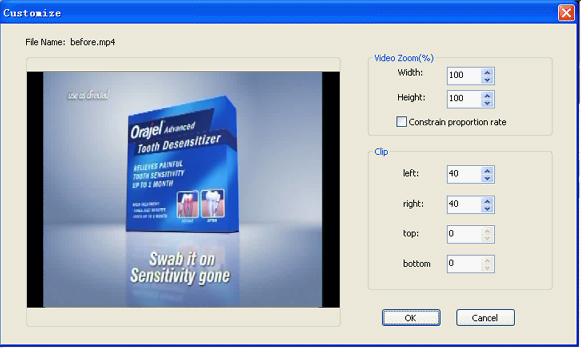
You can define the video size by Video Zoom options.
Padding left, right, top and bottom can be set according your own preference.
Tutorials
Topics

Copyright © 2023 Boilsoft Systems International Inc. All rights reserved.