Boilsoft ALAC to AU Converter tutorial
Wanna convert ALAC video files to AU audio format? Our ALAC to AU converter serves you at any time.
Glossary:
Apple Lossless (also known as Apple Lossless Encoder, ALE, or Apple Lossless Audio Codec, ALAC) is an audio codec developed by Apple Inc. for lossless data compression of digital music.Apple Lossless data is stored within an MP4 container with the filename extension .m4a. It is not a variant of AAC (which is a lossy format), but a distinct lossless format that uses linear prediction similar to other lossless codecs such as FLAC and Shorten.All current iPod players can play Apple Lossless-encoded files. It does not use any digital rights management (DRM) scheme, but by the nature of the container, it is thought that DRM could be applied to ALAC much the same way it can with other files in QuickTime containers.
The AU file format is a simple audio file format introduced by Sun Microsystems. The format was common on NeXT systems and on early Web pages. Originally it was headerless, being simply 8-bit µ-law-encoded data at an 8000 Hz sample rate. Hardware from other vendors often used sample rates as high as 8192 Hz, often integer factors of video clock signals. Newer files have a header that consists of six unsigned 32-bit words, an optional information chunk and then the data (in big endian format).
How to convert?

Step 1 Add video or audio formats
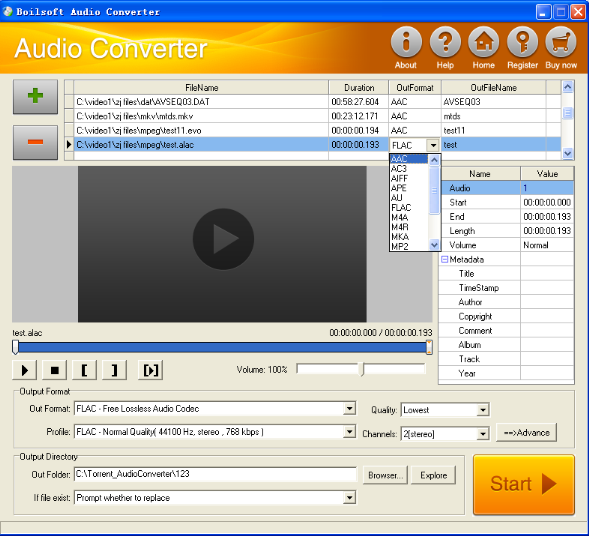
Press Add to add the ALAC files you want to convert, then select AU as the output format.
Step 2 Edit the file(Optional)
Press
![]() to play the files and the timer will start to work. Press
to play the files and the timer will start to work. Press
![]() to stop.
to stop.
This feature is designed for you to measure your favorite segment.
When you want to designate the segment, you can press
![]() to set starting time and
to set starting time and
![]() ending time.
ending time.
Press
![]() to listen to the selected segment.
to listen to the selected segment.
Step 3 Customize the audio (Optional)
As can be seen from the diagram, the panel allows you to set the expected volume and output format of the audio, and to customize the sample rate, Bit rate and channels the audio will contain.
Press
![]() to listen to the audio.
to listen to the audio.
Step 4 Customize the metadata information (Optional)
We can see from the picture that the metadata information of the output audio, such as title, author, copyright, comment, album, track, can be customized merely by typing in what you want to display
Step 5 Get your cool melody
When all settings are completed, just press Start Button to gain your favorite AU from your output directory soon.

