Boilsoft DivX to MKA Converter tutorial
Nowadays, more and more advanced media formats are offering you visual shocks. It is time to use our DivX to MKA Converter to convert DivX to trendy MKA.
Glossary:
DivX is a brand name of products created by DivX, Inc. (formerly DivXNetworks, Inc.), including the DivX Codec which has become popular due to its ability to compress lengthy video segments into small sizes while maintaining relatively high visual quality.There are two DivX codecs; the regular MPEG-4 Part 2 DivX codec and the H.264/MPEG-4 AVC DivX Plus HD codec. It is one of several codecs commonly associated with "ripping", whereby audio and video multimedia are transferred to a hard disk and transcoded.
The Matroska Multimedia Container is an open standard free container format, a file format that can hold an unlimited number of video, audio, picture or subtitle tracks inside a single file.[1] It is intended to serve as a universal format for storing common multimedia content, like movies or TV shows. Matroska is similar in concept to other containers like AVI, MP4 or ASF, but is entirely open in specification, with implementations consisting mostly of open source software. Matroska file types are .MKV for video (with subtitles and audio), . MKA for audio-only files and .MKS for subtitles only.
How to convert?
Step 1 Add video or audio formats
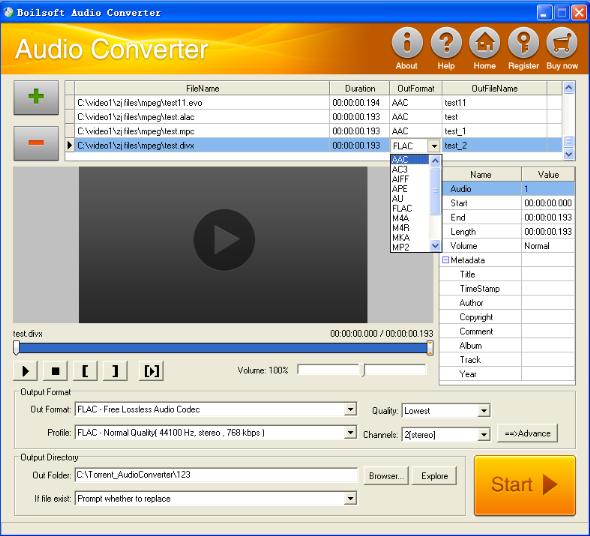
Press Add to add the DivX you want to convert, then select mka as the output format.
Step 2 Edit the file (Optional)
Press
![]() to play the files and the timer will start to work. Press
to play the files and the timer will start to work. Press
![]() to stop.
to stop.
This feature is designed for you to measure your favorite segment.
When you want to designate the segment, you can press
![]() to set starting time and
to set starting time and
![]() ending time.
ending time.
Press
![]() to listen to the selected segment.
to listen to the selected segment.
Step 3 Customize the audio (Optional)
As can be seen from the diagram, the panel allows you to set the expected volume and output format of the audio, and to customize the sample rate, Bit rate and channels the audio will contain.
Press
![]() to listen to the audio.
to listen to the audio.
Step 4 Customize the metadata information (Optional)
We can see from the picture that the metadata information of the output audio, such as title, can be customized merely by typing in what you want to display
Step 5 Get your cool melody
When all settings are completed, just press Start Button to gain your favorite MKA from your output directory soon.
Tutorials


Copyright © 2023 Boilsoft Systems International Inc. All rights reserved.