Home > Boilsoft Audio Converter > Formats > FLV to AC3
Boilsoft FLV to AC3 Converter tutorial
Whenever you want to convert FLV to AC3, our smart FLV to AC3 Converter is your best choice.
Glossary:
Flash Video is a container file format used to deliver video over the Internet using Adobe Flash Player versions 6–10. Flash Video content may also be embedded within SWF files. There are two different video file formats known as Flash Video: FLV and F4V. The audio and video data within FLV files are encoded in the same way as they are within SWF files. The latter F4V file format is based on the ISO base media file format and is supported starting with Flash Player 9 update 3. Both formats are supported in Adobe Flash Player and currently developed by Adobe Systems. FLV was originally developed by Macromedia.
FLV has quickly established itself as the format of choice for embedded video on the web. Notable users of the Flash Video format include YouTube, Hulu, Google Video, Yahoo! Video, metacafe, Reuters.com, and many other news providers.
Dolby Digital AC-3 is the common version containing up to six discrete channels of sound. The most elaborate mode in common usage involves five channels for normal-range speakers (20 Hz – 20,000 Hz) (right front, center, left front, rear right, rear left) and one channel (20 Hz – 120 Hz allotted audio) for the subwoofer driven low-frequency effects. Mono and stereo modes are also supported. AC-3 supports audio sample-rates up to 48 kHz. Batman Returns was the first film to use Dolby Digital technology when it premiered in theaters in Summer 1992. The Laserdisc version of Clear and Present Danger featured the first Home theater Dolby Digital mix in 1995.
How to convert?
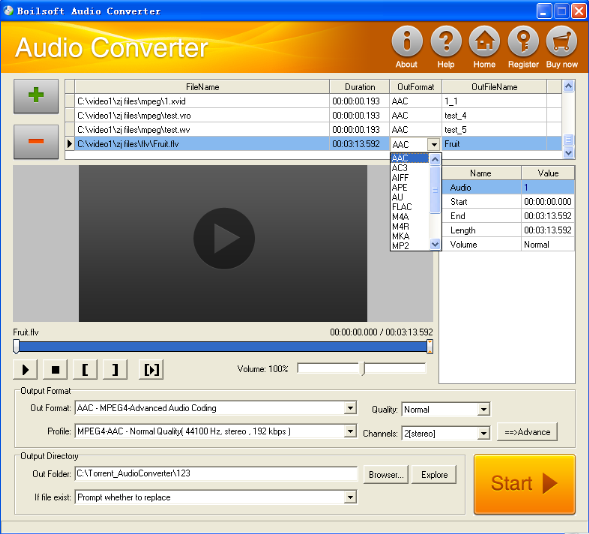
Step 1 Add video or audio formats
Press Add to add the FLV you want to convert, then select ac3 as the output format.
Step 2 Edit the file (Optional)
Press
![]() to play the files and the timer will start to work. Press
to play the files and the timer will start to work. Press
![]() to stop.
to stop.
This feature is designed for you to measure your favorite segment.
When you want to designate the segment, you can press
![]() to set starting time and
to set starting time and
![]() ending time.
ending time.
Press
![]() to listen to the selected segment.
to listen to the selected segment.
Step 3 Customize the audio (Optional)
As can be seen from the diagram, the panel allows you to set the expected volume and output format of the audio, and to customize the sample rate, Bit rate and channels the audio will contain.
Press
![]() to listen to the audio.
to listen to the audio.
Step 4 Get your cool melody
When all settings are completed, just press Start Button to gain your favorite ac3 from your output directory soon.
Í
Tutorials

Copyright © 2023 Boilsoft Systems International Inc. All rights reserved.