Home > Boilsoft Audio Converter > Formats > RA to WAV
Boilsoft RA to WAV Converter tutorial
WAV is a small and powerful boy in the area of multimedia. Shall we convert RA to WAV?
Glossary:
RealAudio files were originally identified by a filename extension of .ra (for Real Audio). In 1997, RealNetworks also began offering a video format called RealVideo. The combination of the audio and video formats was called RealMedia and used the file extension .rm. However, the latest version of RealProducer, Real's flagship encoder, reverted to using .ra for audio-only files, and began using .rv for video files (with or without audio), and .rmvb for VBR video files. The .ram (Real Audio Metadata) and .smil (Synchronized Multimedia Integration Language) file formats are sometimes encountered as links from web pages.
WAVE or WAV , short for Waveform Audio File Format,(also, but rarely, named, Audio for Windows) is a Microsoft and IBM audio file format standard for storing an audio bitstream on PCs. It is an application of the RIFF bitstream format method for storing data in “chunks”, and thus is also close to the 8SVX and the AIFF format used on Amiga and Macintosh computers, respectively. It is the main format used on Windows systems for raw and typically uncompressed audio. The usual bitstream encoding is the Linear Pulse Code Modulation (LPCM) format.
How to convert?

Step 1 Add video or audio formats
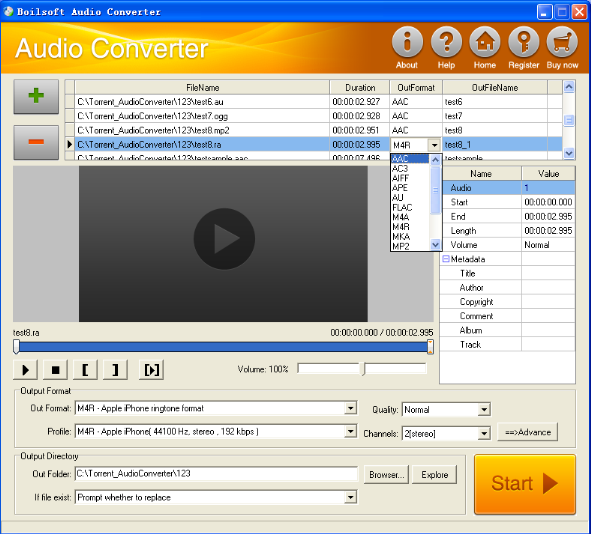
Press Add to add the RA you want to convert, then select WAV as the output format.
Step 2 Edit the file (Optional)
Press
![]() to play the files and the timer will start to work. Press
to play the files and the timer will start to work. Press
![]() to stop.
to stop.
This feature is designed for you to measure your favorite segment.
When you want to designate the segment, you can press
![]() to set starting time and
to set starting time and
![]() ending time.
ending time.
Press
![]() to listen to the selected segment.
to listen to the selected segment.
Step 3 Customize the audio (Optional)
As can be seen from the diagram, the panel allows you to set the expected volume and output format of the audio, and to customize the sample rate, Bit rate and channels the audio will contain.
Press
![]() to listen to the audio.
to listen to the audio.
Step 4 Customize the metadata information (Optional)
We can see from the picture that the metadata information of the output audio, such as title, author, copyright, comment, album, track, can be customized merely by typing in what you want to display.
Step 5 Get your cool melody
When all settings are completed, just press Start Button to gain your favorite WAV from your output directory soon.

