Home > Boilsoft Audio Converter > Formats > VRO to MP2
Boilsoft VRO to MP2 Converter tutorial
MP2 has been our faithful friend in the field of media, shall we convert VRO to MP2?
Glossary
The DVD-VR standard defines a logical format for video recording on DVD-R, DVD-RW, and DVD-RAM style media, including the dual layer versions of these media. As opposed to media recorded with the DVD+VR recording standard, the resulting media are not DVD-Video compliant, and will not play back in some DVD-Video players. Most DVD video recorders in the market that support DVD-R, DVD-RW, or DVD-RAM media will allow recording to these media in DVD-VR mode, as well as in a DVD-Video compliant mode. It is possible to use the DVD-VR format with DVD+R and DVD+RW media, but no examples are known other than some PC based recording utilities.
MPEG-1 Audio Layer II or MPEG-2 Audio Layer II ( MP2 , sometimes incorrectly called Musicam or MUSICAM) is a lossy audio compression format defined by ISO/IEC 11172-3 alongside MPEG-1 Audio Layer I and MPEG-1 Audio Layer III (MP3). While MP3 is much more popular for PC and internet applications, MP2 remains a dominant standard for audio broadcasting.
How to convert?

Step 1 Add video or audio formats
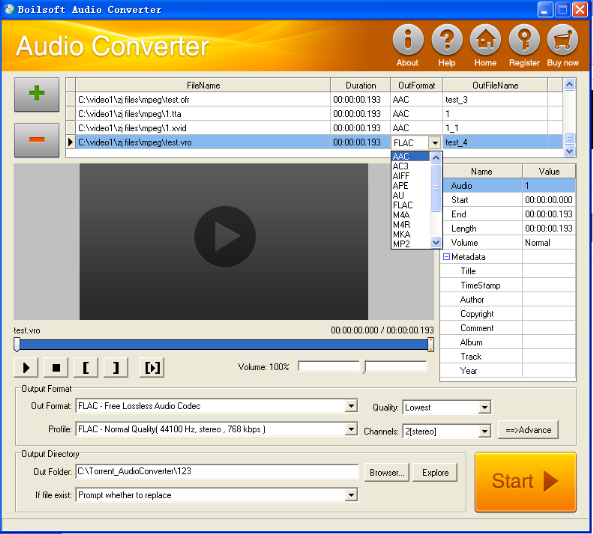
Press Add to add the VRO you want to convert, then select MP2 as the output format.
Step 2 Edit the file (Optional)
Press
![]() to play the files and the timer will start to work. Press
to play the files and the timer will start to work. Press
![]() to stop.
to stop.
This feature is designed for you to measure your favorite segment.
When you want to designate the segment, you can press
![]() to set starting time and
to set starting time and
![]() ending time.
ending time.
Press
![]() to listen to the selected segment.
to listen to the selected segment.
Step 3 Customize the audio (Optional)
As can be seen from the diagram, the panel allows you to set the expected volume and output format of the audio, and to customize the sample rate, Bit rate and channels the audio will contain.
Press
![]() to listen to the audio.
to listen to the audio.
Step 4 Customize the metadata information (Optional)
We can see from the picture that the metadata information of the output audio, such as title, author, copyright, comment, album, track, can be customized merely by typing in what you want to display.
Step 5 Get your cool melody
When all settings are completed, just press Start Button to gain your favorite MP2 from your output directory soon.

