Can I export Spotify playlists to iTunes and play them with iTunes?
iTunes and Spotify are two most popular music apps used by both Mac and Windows users. iTunes is a tool for you to organize and enjoy the music, movies, and TV shows you already have and shop for the ones you want. You can also use iTunes to access Apple Music, where you can stream 45 million ad-free songs with a $9.99/per month subscription. It also provides a three-month free trial. Spotify is a streaming music service which can be accessed for free or paid. Many people ask is it possible to import Spotify playlists to iTunes library and use iTunes to organize and play the Spotify songs you downloaded?
Actually, Spotify can import your local files and playlist from iTunes, but you can't export any content from the Spotify catalogue or offline playlists back into iTunes or onto an mp3 player or anything. However, you can use third-party software to remove Spotify DRM and convert Spotify songs/playlists to mp3, then you can transfer the Spotify songs to iTunes just like ordinary music files.
Here, we show you how to import your Spotify songs and playlists into iTunes.
If you want to transfer Spotify songs to iTunes library, there are 2 steps:
1. Remove Spotify DRM and convert Spotify music to mp3.
2. Move the Spotify mp3 songs to iTunes Library.
In iTunes, click File > Add to Library, locate a file or folder, and click Open.
Part 1 Remove Spotify DRM and convert Spotify songs to mp3
For step 1, you will need a professional
Spotify to mp3 converter
–
Boilsoft Spotify Music Converter
, which allows you to easily remove Spotify DRM and convert Spotify songs to plain audios such as mp3.
Related: If you want to transfer Spotify playlists to Google Play Music, check this tutorial.
Firstly, run Boilsoft Spotify Music Converter
Download, install and run Boilsoft Spotify Music Converter on your Mac or Windows.
![]()
![]()
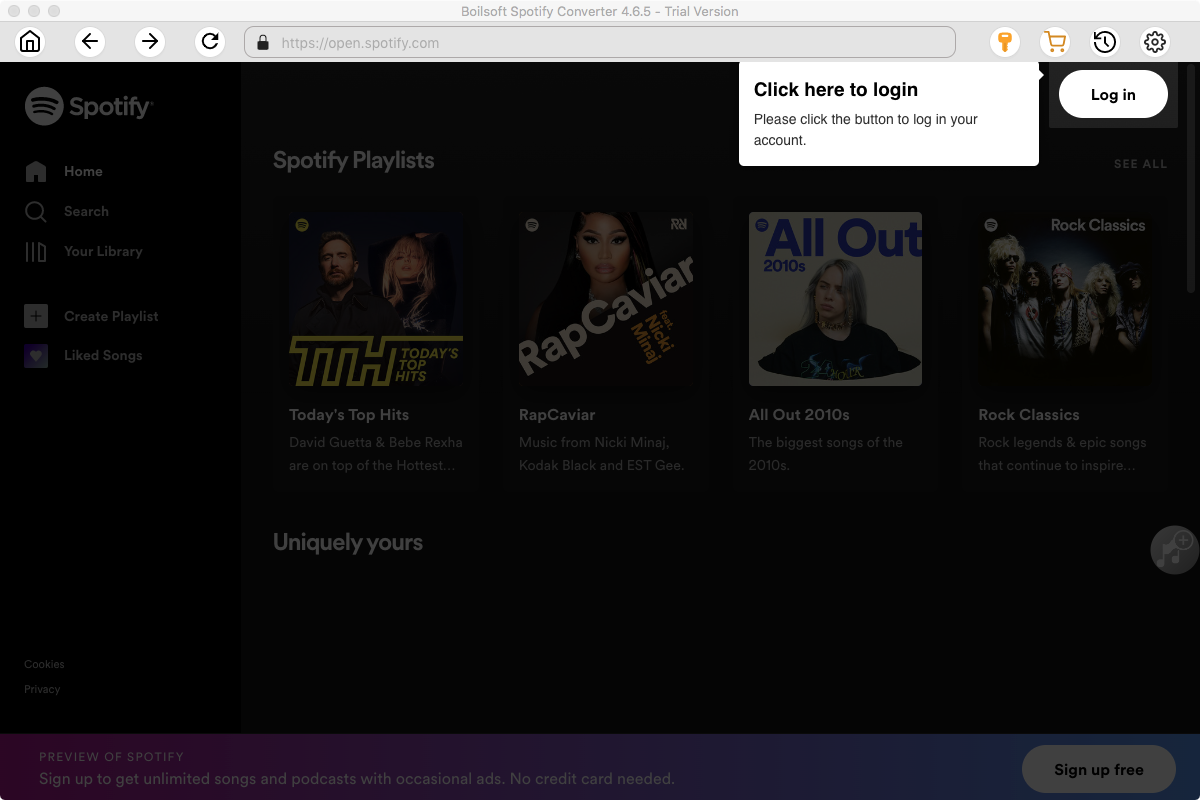
We will take Mac version as example. The interface is shown as below. Log in your Spotify account, whether free or premium.
Secondly, add Spotify songs, albums, playlists or artists
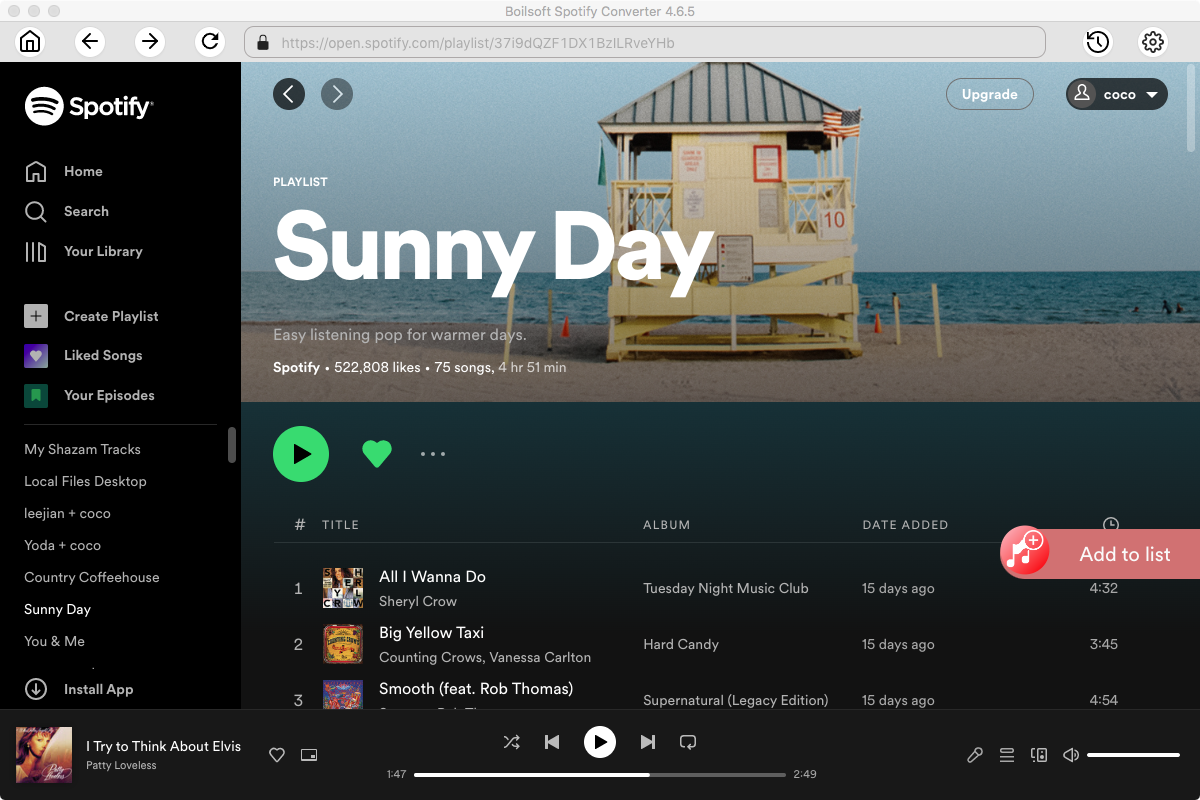
You can now drag&drop the playlists you want to convert to mp3 to the interface directly from Spotify App. If you are using Spotify web player, click Add Files icon and copy&paste the link of the playlist to the bottom input area. Boilsoft Spotify Music Converter will automatically load all songs contained in the playlist.
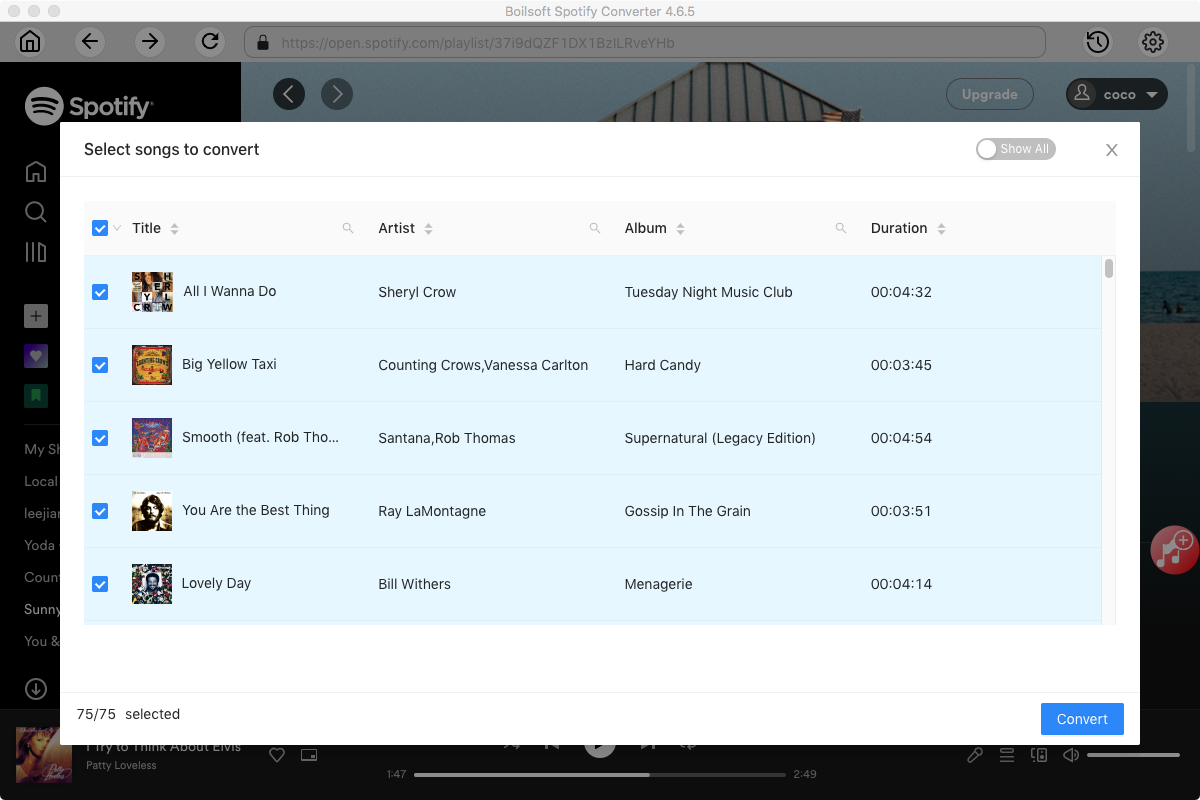
Click Add and you will see all songs on the interface.
Thirdly, start to convert Spotify playlists to MP3
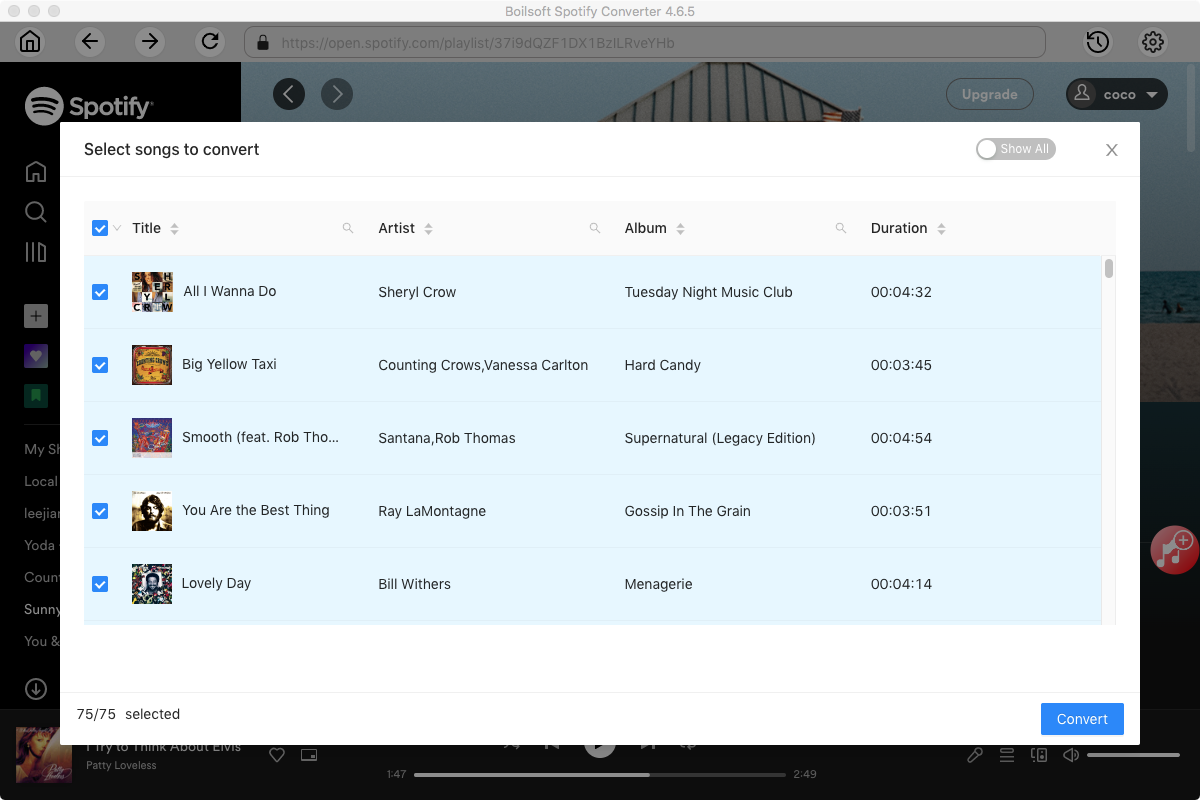
Click Convert icon to start converting Spotify playlists to MP3. After conversion, you will get the drm-free MP3 music with 100% original quality and ID3 tags. Now you can transfer them to your iTunes library.
Note:
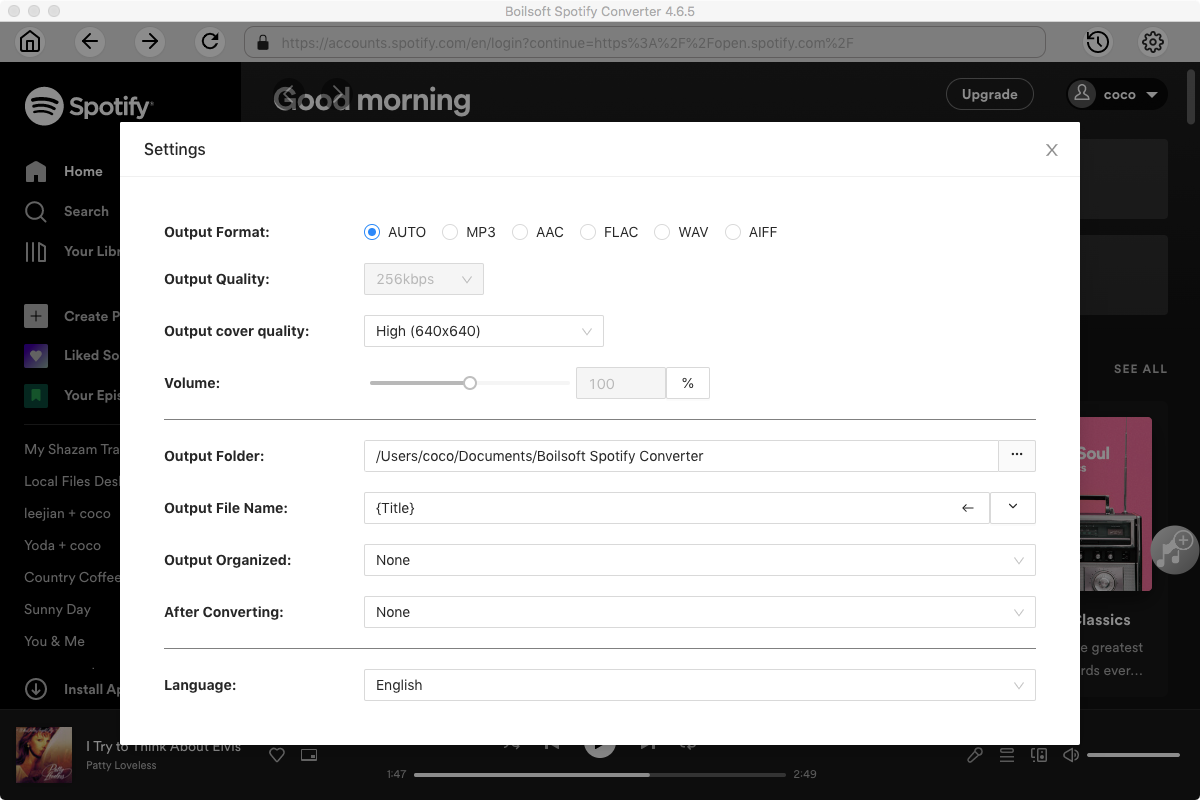
The default format is MP3. If you want to change output format(M4A, WAV or FLAC), click Option button. You can also set music quality by changing bitrate and samplerate.
Part 2 Sync DRM-free Spotify playlists to iTunes
Add the DRM free Spotify songs from your computer to your iTunes library
Do either of the following:
▪ Drag a song or folder from the desktop to the iTunes window.
If you add a folder, all the songs it contains are added to your library.
▪ In iTunes, choose File > Add to Library or Add Folder to Library, locate a file or folder, then click Open.
By default, adding items to your iTunes library creates a reference to the file’s current location; the original file remains in the current location unless you select “Copy files to the iTunes Media folder when adding to library.” For information about copying files to the iTunes folder instead of creating references to them, see Change where your iTunes files are stored.
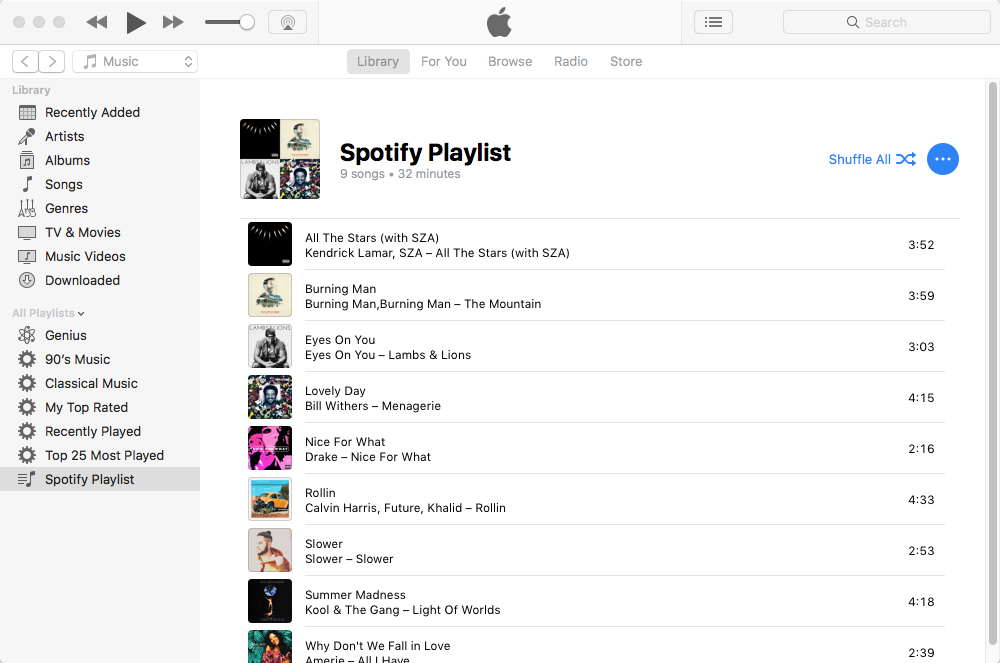
To add the Drm-free Spotify songs to an iTunes playlist, click File - New - Playlist. Edit the playlist name and then drag&drop the Spotify songs to the playlist directly.
Read More:
- Spotify VS. Apple Music
- Best Spotify to MP3 Converter
- Download Spotify playlists with Spotify Free
- Spotify playlist Converter
- Remove DRM from Spotify music
- Move Spotify playlists to Google Play Music
- Listen to Spotify music on MP3 player
- Use Spotify Free abroad for more than 14 Days
- Sync Spotify music to your iPod
- Listen to Spotify on airplane mode without premium
- Simple ways to listen to Spotify offline for free
- How to download music from Spotify
- Export Spotify playlists to iTunes
- How to download Spotify songs without Premium
- How to download Spotify playlists to MP3
- How to download Spotify Music with Spotify Free
- How can I download music from Spotify to MP3
- How to convert Spotify to MP3
- 2018 Top 3 Spotify downloader
- Import Spotify songs to another music player
- Listen to Spotify in a car from a USB Flash Drive
- Enjoy Spotify music on iPod
- Enjoy Spotify music on MP3 player
- Transfer Spotify music to Google Play Music
- 5 Free Spotify downloader
- Play Spotify music with other music players
- Spotify playlist downloader
- How to play Spotify on Sonos
- How to extract MP3 files from Spotify
- How to convert Spotify to flac?
- How to make ringtones with Spotify songs?

